Monthly Archives: December 2014
SmartCloud Tip #7: Notes BUILT-IN tool for migrating to SmartCloud
Want a simple method for migrating mail to SmartCloud? Maybe you are interested in moving to a Service-Only configuration, but were told you couldn’t migrate the data? Maybe you already completed a migration in a hybrid environment only to find one mailbox that was missed and needs to be migrated after the migration specialist is gone?
This process is embarrassingly simple and could make migration tools obsolete, at least for smaller environments. This puts self-service migrations in the hands of the end user. It could eliminate many billable hours transferring mail for Certified Data Transfer Managers (DTM) like myself. But I believe in things like Open Source software and Sharing Knowledge for the greater good.
Use Archiving. It’s that simple.
The steps are so easy an end user could do it. Here are the details:
Overview:
Adjust the ACLs of the mail files as necessary.
Create local replicas of the old mail file and the new mail file.
Setup Archive settings in the old mail file to archive into the local new mail file.
Archive Now. (This step will delete everything from the local replica of the old mail file, so don’t let it replicate back to the server in case you need it for some reason.)
Replicate the new mail file back to SmartCloud.
Review the old mail file to ensure all documents were archived.
The details:
1. If you are going to switch to a Service-only environment, you will be getting a new Notes ID. Make sure it has access to your old mail file. This step may need to be done by the system administrator.
2. Open your old mail.
3. Create a local replica of it. It Must not be encrypted. If you already have a local replica that is encrypted, you will need to make a new one.
4. Uncheck the box on the replicator page to replicate it. This will keep it from replicating the deletions back to the server after you archive.
5. Repeat steps 2,3, & 4 for your new mail file in SmartCloud.
6. Open the local replica of your old mail file.
7. Pull down Actions – Archive – Settings…

8. Click on the Criteria tab. Disable any criteria that have a check mark indicating they are enabled.
9. Click the Create… button.
10. Enter a name for this criteria, something like “Move to SmartCloud”.
11. Check the box to Enable this Criteria.
12. In the field to select what should happen, browse to and select the local replica of your new SmartCloud mail file. The dialog will look like this:

10. Click the Selection Criteria button.
12. Leave the setting to “not modified in more than”, and change the period to 0 days.

13. Click on OK to all of the boxes. If the following dialog pops up, click yes.

14. The Scheduling settings will be displayed. Click OK without enabling the schedule.

15. You are now ready to perform the archiving. From the inbox of your old mail file, Pull down Actions – Archive – Archive Now.
16. When it is complete, you can check the document count in the database properties. It should be close to zero.Check the All documents view and in your calendar check the Lists – Calendar Entries view for documents that didn’t get brought over. It may be easiest to just re-create calendar entries.
17. Review the folders and calendar in the new mail file. When you are satisfied with the documents in the new mail file, go back to the replicator page and enable it so it can replicate to the SmartCloud server.
That is the whole process in a nutshell. There are some potential obstacles, like connection speed to the Internet, mail file size and Private folders. Also, you may also prefer to have someone with experience to turn on and configure your SmartCloud environment and address some other architectural details, but the act of moving your data can be incredibly simple. I have helped companies use this method very successfully. If you want help with the process, contact me at Divergent Solutions.
See the full list of tips HERE.
SmartCloud Tip #6: Dealing with Middle Initials
In a Hybrid SmartCloud environment, if you have users in SmartCloud who have a middle name or middle initial, that information does not get added to the SmartCloud directory automatically as there is no middle name field. It shows up in the IBM SmartCloud Notes area, but not in the User Accounts area under Manage Organization. So how do you deal with this? The process is actually very simple.
1. Find the user under Manage Organization – User Accounts.
2. Click on the name to edit it.
3. In the Given name field, after the person’s name, add a space and the middle initial or middle name as it appears in their person document in the directory.
4. Click Next to page through the settings until you get to Finish. (Click on Account Login to jump to the last page of settings and save a few clicks.) You’re done.
So what if you need to do this for a lot of people, in particular, during a migration? In this case, use the Integration Server Service. Again, a straight-forward process.
1. Create a view in your Domino Directory that looks like this:
![]()
The three columns should have the following headings spelled exactly as they appear here, and formulas:
emailAddress –> Field: InternetAddress
Action –> Formula: “update”
givenName –> Formula: @Trim(@Implode(@Trim(@Subset(FirstName; 1)); ” , “)+ ” ” + MiddleInitial)
You can add additional fields to update if you so choose. Just be sure to follow the rules defined in the SmartCloud documentation.
2. Open the view you just created and select the documents that you want to update the middle initial in SmartCloud.
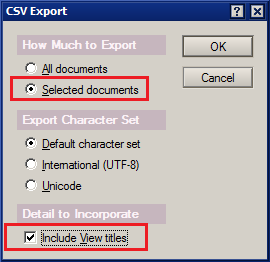
3. Pull down File – Export. Choose a file type of Comma Separated Value and name the file according to the rules for the Integration Server. Select Save.
4. Choose Save Selected and Include View Titles.
5. Process the .csv as described in the documentation.
I think this process should not be necessary at all, but until the directory in SmartCloud has and uses the middleInitial field from your Domino Directory, this tip is essential.
See the full list of tips HERE.
Some tips are worth revisiting each year: Holidays in Dom Dir and Inbox Cleanup
Some topics are worth revisiting every year. Here are two of my favorites:
How to create holidays in the Domino Directory for importing into calendars

